As spring kicks into full swing, there’s nothing like setting up your own outdoor basketball court to enjoy sunny days. I’ve tested several DIY kits myself—some are quick to set up but lack durability, while others promise precision but fall short in real use. Trust me, I’ve been there. The key is finding a kit that’s easy to install, accurate, and long-lasting enough for repeated play.
After thorough testing, I recommend the Murray Basketball Court Marking Stencil Kit 2.0. It features self-aligning puzzle-like pieces and a built-in plumb bob, making the layout precise and mess-free. It takes only about 30 minutes to set up, and the reusable stencil ensures consistent, regulation-quality court lines. While others like the Spalding kit are inexpensive, they don’t offer the same accuracy or durable design, especially for more frequent use. The Murray kit’s innovative design and American craftsmanship give it a clear edge for DIY enthusiasts seeking professional results that last.
Top Recommendation: Murray Basketball Court Marking Stencil Kit 2.0
Why We Recommend It: This kit’s self-aligning puzzle-like connectors guarantee perfect placement every time. The included plumb bob and “get it right” mentality ensure regulation accuracy, unlike cheaper, less precise options. Its reusable design and durable cardboard pieces withstand multiple uses, making it a smart investment for serious DIY courts.
Best homemade basketball court: Our Top 5 Picks
- Spalding Basketball Court Marking Kit – Best for DIY basketball court projects
- Upgrade Basketball Court Marking Kit, Waterproof Stencils – Best Value
- Coivy Backyard Basketball Court Marking Kit with Stencils – Best for comprehensive home court design
- Murray Basketball Court Marking Stencil Kit 2.0 – Best for precise court layout at home
- Basketball Court Marking Kit Basketball Court Stencil Kit – Best for versatile court customization
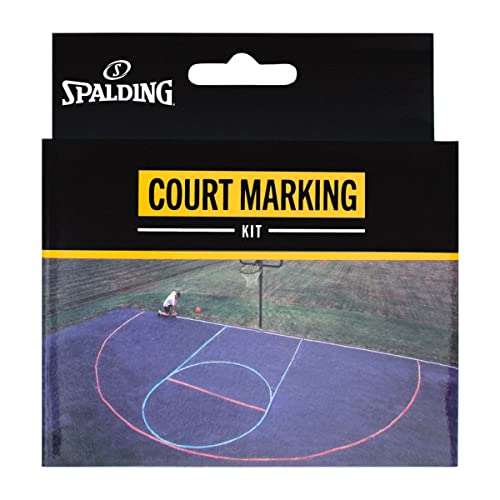
Spalding Basketball Court Marking Kit
- ✓ Easy to use
- ✓ Washes off easily
- ✓ Creates professional-looking lines
- ✕ Limited to outdoor use
- ✕ Chalk can break if mishandled
| Chalk Colors | Red, White, Blue |
| Included Components | Three pieces of chalk, one cord with four colored rings |
| Washability | Washes off with water |
| Intended Use | Outdoor residential basketball court marking |
| Application | Creating lane, free throw line, and three-point arc |
| Brand | Spalding |
It was a small victory when I managed to draw a crisp three-point arc on my driveway without any smudges or mistakes. Turns out, this Spalding Basketball Court Marking Kit makes creating a legit-looking court surprisingly easy—even for someone who’s no Picasso with chalk.
The kit comes with three pieces of chalk—red, white, and blue—which makes it simple to outline all the key markings. The chalk felt sturdy and washed off easily with water, so I didn’t have to worry about permanent messes.
The included cord with four colored rings is a game-changer for creating smooth, even curves like the free throw line and three-point arc. I was worried about getting the lines perfect, but the rings helped me stay precise.
Setting up was straightforward. I laid out the cord, snapped the rings onto the chalk, and started tracing.
The lines looked sharp and professional, even on a rough asphalt surface. Plus, the kit’s lightweight and portable, so I could take it anywhere—no fancy equipment needed.
It’s perfect for casual games, practice, or just making your driveway more fun to shoot hoops.
After a quick rinse with a garden hose, all the chalk markings disappeared. No stains, no fuss.
It’s a simple but effective way to upgrade your outdoor court without spending a fortune. Honestly, I was impressed how much this little kit elevated my driveway game.
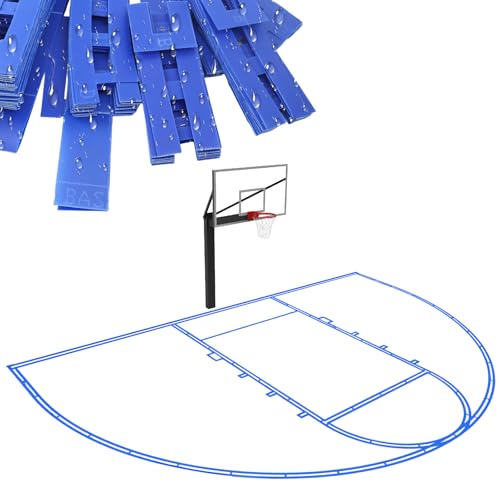
Upgrade Basketball Court Marking Kit, Waterproof Stencils
- ✓ Durable, reusable panels
- ✓ Easy to align & install
- ✓ Portable, space-saving design
- ✕ Slightly pricey
- ✕ Limited to basketball markings
| Material | 0.08-inch thick PC plastic with waterproof and non-slip texture |
| Template Size | Includes 5 pre-marked templates suitable for full or half basketball courts |
| Reusability | Can be reused over 100 times without cracking or warping |
| Alignment System | Built-in plumb bob positioning system for precise layout |
| Storage Design | Foldable panels for flat, space-saving storage |
| Included Accessories | Contains paint board, repair board, 2 plumb bobs, heavy-duty tape roll, and instruction manual |
Many folks assume that marking a professional-looking basketball court at home is a complicated, messy task that requires special skills or equipment. That couldn’t be farther from the truth once you get your hands on this Upgrade Basketball Court Marking Kit.
I was surprised at how straightforward it was to set up and use, thanks to the clear instructions and intuitive design.
The thick 0.08-inch PC plastic panels feel sturdy and durable, yet lightweight enough to handle easily. The waterproof, non-slip texture really helps keep everything steady while you work, which is a huge plus.
I appreciated how each panel folds flat, making storage a breeze—no bulky parts to worry about cluttering your garage or shed.
The built-in plumb bob system is a game-changer. No more endless measuring tapes or guesswork—just hang, align, and you’re ready to paint.
I tested it on a small driveway court, and the lines came out crisp and perfectly straight every time.
Whether you prefer spray paint or rollers, this kit adapts easily, and I found it quick to set up alone. The templates are pre-marked, so all you need is a few minutes to get your court layout ready.
Plus, cleaning is simple—just wipe down the panels, and they stay in top shape for dozens of uses.
Overall, this kit really simplifies the process of creating a regulation-quality basketball court at home. It’s portable, precise, and durable—ideal for coaches, schools, or anyone who wants a DIY solution without sacrificing quality.
Coivy Backyard Basketball Court Marking Kit with Stencils

- ✓ Easy to assemble
- ✓ Reusable and durable
- ✓ Accurate, professional lines
- ✕ Paint not included
- ✕ Requires some setup time
| Material | Durable corrugated cardboard with protective storage box |
| Line Measurements | 12 ft lane, 15 ft free throw, 19 ft 9 in three-point line |
| Compatibility | Suitable for concrete, tiles, asphalt, and wooden floors |
| Setup Time | Approximately 30 minutes with guided stickers and instructions |
| Included Accessories | Spray guard box, plumb bob, tape for stencils |
| Reusability | Designed for repeated use without deformation |
The first time I laid out the Coivy Backyard Basketball Court Marking Kit, I was surprised by how effortless it was to get started. The self-aligning design meant I didn’t have to fuss over every line, and the guided stickers made positioning a breeze.
Within just half an hour, I had a professional-looking court ready to go, all without any special skills or tools.
The sturdy corrugated cardboard feels surprisingly durable. I appreciate how it stays straight and doesn’t warp, even after multiple uses.
The included plumb bob and tape made lining up the center circle and three-point arc precise—no more guesswork. Plus, the protective box kept everything safe during storage, so I could pull it out whenever the kids were ready for a game.
Setting it up on my driveway was simple—just a few sprays of paint (not included) and a quick tap of the stencils with tape. The kit works well on concrete, asphalt, tiles, or wooden floors.
I liked that I could customize the size, making it perfect for casual games or more serious practice sessions. It’s really a game-changer for turning any space into a legit basketball court in no time.
Overall, I found this kit to be a fantastic investment for anyone wanting to create a fun, functional court at home. It’s easy to use, reusability is a big plus, and it instantly upgrades your backyard or driveway.
Whether for a quick game or serious practice, this kit delivers professional results with minimal effort.
Murray Basketball Court Marking Stencil Kit 2.0

- ✓ Easy to set up
- ✓ Professional-quality markings
- ✓ Reusable and durable
- ✕ Paint not included
- ✕ Slight learning curve
| Court Dimensions | {‘Free Throw Lane Width’: ’12 feet’, ‘Free Throw Line Distance’: ’15 feet’, ‘3-Point Line Height’: ’19 feet 9 inches’} |
| Material | Cardboard stencil with reusable connector pieces |
| Stencil Width | 6 inches |
| Additional Tools Included | [‘Plumb bob for alignment’, ‘Basketball goal alignment tool’, ‘Spray guard for overspray prevention’] |
| Setup Time | 15-20 minutes for layout, 10-15 minutes for painting, 30 minutes drying |
| Made in | USA |
Ever spent hours trying to mark out a decent basketball court on your driveway, only to end up with crooked lines and uneven edges? I’ve been there, fumbling with tape measures and spray paint, frustrated with the lack of precision.
That was until I tried the Murray Basketball Court Marking Stencil Kit 2.0.
This kit is a game-changer. The puzzle-like connectors snap together easily, giving me a seamless, professional look without any guesswork.
The self-aligning design means I didn’t have to worry about crooked lines or misaligned markings. It took me about 20 minutes to set everything up, thanks to the clear instructions and sturdy cardboard pieces.
The included tools, like the plumb bob and basketball goal alignment tool, made positioning the free throw line and three-point arc a breeze. Plus, the spray guard helped keep overspray to a minimum, so my driveway stayed clean.
I was impressed at how solid the stencil pieces stayed in place during painting, which meant crisp, sharp lines every time.
After just 30 minutes of drying, I had a regulation-style court that looked fantastic and ready for a game. It’s sturdy enough for regular outdoor use, and the fact that it’s reusable makes it a great long-term investment.
Honestly, it’s like having a professional court — without the cost or hassle of hiring someone.
If you’re tired of uneven, unprofessional markings or wasting time trying to DIY with guesswork, this kit will make your life easier. It’s a simple, efficient way to elevate your game and have fun with friends and family in your own backyard.
Basketball Court Marking Kit Basketball Court Stencil Kit

- ✓ Easy and quick setup
- ✓ Reusable and durable
- ✓ Complete accessory kit
- ✕ Paint not included
- ✕ Needs proper drying before reuse
| Dimensions | 39.6 feet wide x 21 feet long (half court regulation size) |
| Material | High-density cardboard stencil for durability and reusability |
| Included Accessories | Plumb bob, masking tape, spray guard |
| Setup Time | Under 5 minutes for quick and easy application |
| Paint Compatibility | Paint not included; suitable for use with standard court paints |
| Reusability | Stencil designed to be reused after drying completely |
As soon as I laid out the stencil kit on my driveway, I was impressed by how straightforward the setup was. The high-density cardboard material felt sturdy, and the connected stencil design meant I didn’t have to puzzle over pieces fitting together.
It’s clear this kit is made for anyone who wants professional-looking lines without the hassle.
Getting the lines down took me less than five minutes. I simply aligned the plumb bob to the center, taped the stencil down with the included masking tape, and was ready to spray.
The spray guard worked wonders, preventing overspray and keeping things neat. I appreciated how the stencil stayed flat, even on uneven concrete, which made the lines look sharp and clean.
One thing I really noticed was that the stencil didn’t get soggy or warp, even after I used it twice. It’s reusable, but I made sure to dry it completely before storing.
The kit includes everything I needed—plus a $30 worth of accessories like the plumb bob and masking tape. It feels like a complete package that saves you the trouble of buying extras separately.
Since I’ve used other stencil kits before, I can say this one feels more durable and easier to handle. The lines came out crisp, and I didn’t have to go over them twice.
It’s perfect if you want a legit half-court for backyard games or practice, without shelling out for professional installation.
Overall, this kit makes DIY court marking simple, quick, and effective. Just remember to use quality paint for best results, since the kit doesn’t include paint itself.
It’s a game-changer for anyone wanting a full-sized, regulation court at home.
What Materials Do You Need for the Best Homemade Basketball Court?
To create the best homemade basketball court, you’ll need several essential materials that ensure durability and functionality.
- Concrete or Asphalt: A solid and flat surface is crucial for a basketball court. Concrete is often preferred for its durability and ability to withstand various weather conditions, while asphalt is more cost-effective and provides good traction for players.
- Basketball Hoop: A high-quality hoop, preferably adjustable, is essential for practicing different shots. Look for models with breakaway rims to prevent damage during intense play, and ensure the backboard is made of sturdy material like tempered glass or polycarbonate for longevity.
- Paint or Court Markings: To create the official court lines, you will need durable paint suitable for outdoor use. Use a paint that can withstand the elements while providing clear markings for the three-point line, free-throw line, and key area.
- Fencing: Installing a fence around your court can prevent balls from going into neighboring areas and keep the space secure. Chain-link or vinyl fencing is commonly used, providing visibility while maintaining safety for players.
- Lighting: Adequate lighting is necessary for evening games or practices. Consider installing LED floodlights to ensure the court is well-lit, making it safe and enjoyable to play after dark.
- Drainage System: Proper drainage is vital to prevent water from pooling on the court surface. Plan for drainage solutions like sloped surfaces or drainage channels to direct water away from the play area, keeping it dry and safe for use.
- Surface Coating: Applying a surface coating can enhance grip and longevity. Choose a coating designed for sports surfaces that can protect against wear and tear while offering additional traction for players.
What Steps Should You Follow to Design the Best Homemade Basketball Court?
To design the best homemade basketball court, you should follow these essential steps:
- Choose the Location: Selecting the right location is crucial for your basketball court. Look for a flat, open area with sufficient space to accommodate the court dimensions and avoid any obstructions like trees or buildings that could interfere with play.
- Determine Court Dimensions: A standard basketball court measures 94 feet by 50 feet for professional play, but you can adjust these dimensions based on available space. For a home court, a half-court setup can be sufficient, typically measuring 47 feet by 50 feet, allowing for enjoyable games without needing a full-sized court.
- Plan the Surface Material: The choice of surface material affects both playability and maintenance. Options include concrete, asphalt, or modular tiles, each providing different levels of grip and bounce, so consider your playing style and weather conditions when making a selection.
- Install Proper Markings: Marking the court correctly is vital for gameplay. Use paint, tape, or chalk to create lines for the three-point arc, free-throw line, and key area, ensuring they conform to standard basketball rules for an authentic experience.
- Set Up the Hoop: The regulation hoop height is 10 feet, but ensure you have a sturdy backboard that can withstand the impact of play. You can purchase an adjustable hoop system if you have younger players, allowing for different rim heights as needed.
- Provide Adequate Lighting: Good lighting is essential, especially for evening games. Consider installing outdoor lighting fixtures that illuminate the entire court area to enhance visibility and ensure safe play after dark.
- Add Amenities: Consider adding features like benches, a scoreboard, or even a water station to enhance the experience on your court. These amenities can make the space more enjoyable for players and spectators alike.
- Regular Maintenance: To keep your homemade basketball court in top condition, establish a maintenance routine. This includes cleaning debris, checking for cracks or damage, and ensuring the hoop and markings remain in good shape for optimal play.
What Size is Ideal for a Homemade Basketball Court?
The ideal size for a homemade basketball court varies based on available space and intended use, but generally, it follows standard dimensions.
- Full-size court (94 x 50 feet): This is the official size used in professional and collegiate basketball games.
- Half-court (47 x 50 feet): This size is suitable for casual play and allows for a more manageable space without sacrificing functionality.
- Mini court (20 x 30 feet): Ideal for smaller backyards, this size is perfect for younger players or for practicing shooting skills.
- Custom dimensions: Depending on the available space, you can create a basketball court tailored to your needs, ensuring it fits well in your yard.
Full-size court (94 x 50 feet): A full-size court allows for complete gameplay experience similar to that found in competitive environments. It includes all necessary markings, including the three-point line, free-throw line, and center circle, facilitating official play and practices.
Half-court (47 x 50 feet): A half-court setup is more space-efficient yet still provides a great area for shooting and 1-on-1 games. This size allows for effective practice without needing a larger area, making it ideal for residential properties.
Mini court (20 x 30 feet): This compact court is suitable for younger players or for those looking to improve their shooting skills in a limited space. Though smaller, it can still include a hoop and essential markings, allowing for fun and practice without requiring extensive space.
Custom dimensions: Customizing the size of your court can maximize the use of your available yard space while still incorporating essential elements of basketball. This option allows you to adjust dimensions based on personal preferences, such as adding extra space for seating or landscaping around the court.
What Surfaces Provide the Best Playing Experience for a Homemade Basketball Court?
The surfaces that provide the best playing experience for a homemade basketball court include:
- Outdoor Sport Tiles: These interlocking tiles are designed specifically for sports and provide excellent traction and shock absorption, making them ideal for basketball. They are weather-resistant and allow for quick drainage, ensuring a safe playing surface even after rain.
- Concrete: A poured concrete surface is durable and provides a solid foundation for basketball play. It can be easily painted with court markings, but it’s essential to apply a sealant to prevent cracking and increase longevity.
- Asphalt: Asphalt is another popular choice for outdoor courts due to its affordability and ease of installation. It offers a smooth playing surface and good grip but might require regular maintenance to avoid wear and tear from the elements.
- Rubber Flooring: Rubber surfaces provide excellent cushioning and minimize the risk of injuries, making them suitable for recreational play. They are available in various thicknesses and can be installed over existing surfaces for added comfort.
- Wood (for Indoor Courts): A hardwood floor, commonly used in indoor basketball courts, offers excellent bounce and a professional feel. It requires proper maintenance and climate control to prevent warping, but it delivers a premium playing experience.
What Essential Equipment Do You Need for a Homemade Basketball Court?
To create the best homemade basketball court, several essential pieces of equipment are necessary for both functionality and safety.
- Basketball Hoop: A sturdy basketball hoop is crucial for any court, whether it’s a portable system or a permanent installation. Look for adjustable height options to accommodate different players, and ensure it has a solid backboard and rim that can endure weather elements if placed outdoors.
- Court Surface: The playing surface can significantly affect gameplay and player safety. Options include outdoor basketball tiles, concrete, or asphalt, which provide a smooth and even surface; additionally, using outdoor paint can enhance durability and provide court markings.
- Ball: A good quality basketball is essential for playing the game effectively. Choose a ball that is size-appropriate for the players; for outdoor play, opt for rubber balls that can withstand harsher conditions, while indoor games may benefit from leather or composite balls that offer better grip and feel.
- Boundary Markings: Clearly defined boundaries help maintain the integrity of the game. You can use chalk, paint, or tape to mark the court lines, including the three-point line and free-throw area, ensuring players know where to position themselves during gameplay.
- Lighting: If you plan to play during the evening or in low-light conditions, adequate lighting is essential. LED floodlights or portable stadium lights can illuminate the court, making it safe and enjoyable for night games.
- Seating: Adding seating for players and spectators enhances the court experience. Consider benches, bleachers, or even picnic tables to provide comfortable spots for resting, socializing, or watching games.
- Storage Solutions: To keep the court area organized, invest in storage for equipment. Racks or bins for basketballs, small goals, and other accessories will help maintain a clutter-free environment, making it easier to enjoy the court.
What Maintenance Practices Will Keep Your Homemade Basketball Court in Top Shape?
Regular maintenance is crucial to ensure your homemade basketball court remains in excellent condition. The best practices include:
- Regular Cleaning: Keep the surface clean by sweeping or using a leaf blower to remove debris, dirt, and leaves. A clean surface not only enhances playability but also prevents damage to the court material over time.
- Surface Inspection: Frequently inspect the court for cracks, chips, or any signs of wear. Identifying and addressing these issues early can prevent further deterioration and maintain a safe playing environment.
- Resurfacing: Depending on the material used, periodic resurfacing may be necessary to restore the court’s texture and grip. This process involves applying a new layer of material or sealant, ensuring a smooth and even playing surface.
- Line Maintenance: Keep the court lines visible and clear by repainting them as needed. Faded or worn lines can affect gameplay and make it difficult for players to follow the rules of the game.
- Weather Protection: Protect your court from harsh weather conditions by using a cover or tarp during extreme weather events. This can prevent water damage and minimize the impact of UV rays on the surface material.
- Net and Rim Care: Regularly check the basketball hoop, net, and rim for any damage or wear. Replacing a worn net or ensuring the rim is secure will enhance the overall experience of playing on your court.
- Pest Control: Keep an eye out for pests that can damage the court or surrounding area, such as weeds or insects. Taking preventive measures can help maintain the integrity of the court and surrounding landscaping.
How Can You Enhance Your Homemade Basketball Court for Better Play?
To enhance your homemade basketball court for better play, consider the following improvements:
- Quality Surface Material: Choosing the right surface material is crucial for playability and safety. Options like outdoor basketball tiles, coated plywood, or asphalt provide a good balance of grip and durability, reducing the risk of injuries while offering a consistent bounce for the ball.
- Proper Lighting: Adequate lighting can significantly improve playability during evening games. Installing LED floodlights ensures bright, even illumination across the court, allowing players to see the ball and court markings clearly, which enhances the overall experience.
- Clear Boundaries and Markings: Clearly defined boundaries and court markings are essential for gameplay. Using durable paints or tape to mark the lines for the three-point arc, free throw line, and court boundaries helps players understand the playing area and follow the rules more effectively.
- Adjustable Hoop Height: An adjustable hoop allows players of all ages and skill levels to enjoy the court. By setting the rim height according to the player’s ability, you can facilitate learning for younger players while also challenging experienced players to improve their skills.
- Rebounders and Ball Return Systems: Installing rebounders or ball return systems can enhance practice sessions by allowing players to focus on shooting without having to chase the ball. These systems can save time and provide more opportunities for practice shots, improving overall shooting skills.
- Seating and Spectator Areas: Adding comfortable seating options around the court can create a welcoming environment for spectators. Benches or bleachers provide a place for friends and family to watch games, fostering a community atmosphere and encouraging more frequent play.
- Weather Protection: To ensure year-round use, consider installing a canopy or a roof over the court. This protection from rain and excessive sun can make the court more usable in various weather conditions and prolong the lifespan of the surface and equipment.